Types of Baking Soda Science Experiments
There are thousands of science experiments to choose from, but ARM & HAMMER™ makes it easy with these simple and fun experiments for kids:
- Baking Soda Volcano Project
- Self-Inflating Balloon Project
- Rust Remover Project
- Bucket of Snow Project
- Bucket of Lava Project
Baking Soda Volcano Science Experiment
The baking soda volcano is a classic experiment that most adults remember from their childhood. But this science experiment being around for generations doesn’t lessen its wonder the first time a student sees the reaction, or decrease the fun and nostalgia for adults. Plus, you can add twists to the basic experiment to make it new and interesting all over again.
For the basic baking soda volcano experiment you need the following materials:
- Material to make the volcano out of. It can be a simple flour dough, papier mâché, air-hardening clay, or even playdoh
- A small cup, jar, vase, water bottle or plastic tube to go in the mouth of the volcano to hold the ingredients
- 2 tbsp ARM & HAMMER™ Baking Soda
- 4 oz. White vinegar
- Food coloring
- Cardboard (optional) to go in the cup, jar or vase if you are using multiple colors
- Dish soap
- A pan, such as a brownie pan or casserole dish to catch the “lava”
Procedure:
- Build your volcano around the container you have chosen in a pan to cath the “lava”. Shape it like a mountain with a pointy peak and leave a hole at least 1.5” in diameter at the top for the lava to come out. If building with air-hardening clay, flour dough, or papier mâché, build the volcano 24 hours ahead of your experiment so that it is dry and hardened. You may choose to paint your volcano to make it look more realistic and topographical. Feel free to add small trees or a village at the base to add to the sense of impending disaster.
- Add about 2 tablespoons of baking soda to the container inside the volcano by pouring through the top. You can experiment with the amount of baking soda and vinegar you use for the best reaction.
- (optional step) If you want to make a multi-colored volcano, cut a piece of cardboard the diameter of your opening, and insert it fully into the tube, separating the baking soda into two wells.
- Add a few drops of food coloring into the tube on top of the baking soda. Try adding some red and some yellow to create an orange color, or go for a fantasy volcano by using any color you want. If you can find black food coloring, that makes a nice addition as well. If you are using multiple colors, add one food coloring to the left side, and one to the right.
- Add a squirt of dish soap on top of the baking soda and food coloring. The color of the dish soap does not matter.
- When you’re ready for the “explosion,” pour 4 oz. of vinegar into the top of the volcano and step back. In a few seconds, the colored “lava” will bubble up and out of the volcano, spilling down its sides.
Baking Soda Volcano Variants
While the original baking soda volcano is always fun and a great learning tool, there are many ways to experiment with the volcano by changing ingredients or the method. The changes below are an excellent way to teach kids about controls and variables in the scientific method.
- Baking Soda Ketchup Volcano: Instead of adding food coloring, add 2 tablespoons of ketchup instead. This will make a thicker, less runny (and of course, red) lava.
- Baking Soda Jack o’ Lantern: Instead of making a volcano, carve a pumpkin with a large mouth. Put the jar in the center of the carved-out pumpkin, where you would put a candle. Follow the procedure above, adding the vinegar last. The reaction will come out of the Jack o’ Lantern’s mouth (and sometimes also nose and eyes, depending on how “explosive” the reaction is). This is a fun experiment for a Halloween party!
- Baking Soda Cauldron: Instead of a volcano, use a pot or Halloween cauldron. Double your amounts of baking soda and vinegar from the standard recipe above to fill the larger volume of the pot/cauldron. Add the baking soda, food coloring, and 2-3 squirts of dish soap to the cauldron, then pour in the 8oz of vinegar. Green is a good color for a witches brew, or try multiple colors. Your cauldron will be bubbling in seconds. As with the volcano, put the pot or cauldron in a pan to help catch any overflow.
Baking Soda and Vinegar Balloon Experiment
This classic Self-Inflating Balloon experiment blows up a balloon thanks to carbon dioxide (CO2) gas released when vinegar and baking soda are combined.
To create the reaction and blow up a balloon, you will need:
- A water bottle
- 2 tablespoons ARM & HAMMER™ Baking Soda
- 4 oz. white vinegar
- Small funnel
- 1 10- or 11-inch balloon
Procedure:
- Use the funnel to add the 4oz of vinegar to the water bottle.
- Rinse and dry the funnel.
- Use the funnel to add the 2 tbsp. of baking soda into the mouth of the balloon.
- Carefully attach the balloon opening over the bottle opening, taking care NOT to release the baking soda yet.
- Once balloon is firmly over the mouth, tip the balloon up to vertical over the bottle, dropping the baking soda into the bottle.
- As the two combine, they release the carbon dioxide gas, which will cause the balloon to expand.
Baking Soda & Vinegar Balloon Experiment: Rubber Glove Variant
If you want to forgo the funnel, you can also do this experiment with a wide mouthed jar or glass and a rubber glove instead of a balloon. The baking soda goes into the fingers of the glove, which will blow up into a puffy hand or a “chicken.” You might need to add a rubber band around the glove when it is over the jar, to ensure a tight seal.
Baking Soda & Vinegar Self-Inflating Balloon as a Science Fair Project
To make your self-inflating balloon a true science experiment, you’ll need to have a hypothesis and test to see whether it is correct. Now that you know what will happen when the baking soda and vinegar combine, you can change one of the variables to see how the reaction is affected and take some measurements. Add a digital timer to test how long it takes for the carbon dioxide to blow up the balloon, then see how the time is affected when you change the amount of vinegar or baking soda in the experiment. To uphold the integrity of the experiment, make sure you only change one variable at a time.
Here are some additional ways to change the variables and make this fun reaction into an easy and affordable science fair project (Adult Supervision Required)
What happens when the vinegar is heated or cooled vs. room temperature?
- You can accomplish this by using two bottles, adding room temperature vinegar to one as your control, then setting the second bottle into a bowl of ice for three minutes to cool it down. Make a hypothesis about which will fill faster: the room temperature vinegar or the cold vinegar. Repeat the experiment with both bottles and time how long it takes for the balloons to fill and which fills first. Record your results.
- Repeat the experiment with a bottle of room temperature vinegar and one with warm vinegar. Make a hypothesis about which will fill faster. Place one bottle with vinegar in a bowl of boiling or very hot water for three minutes to heat it. Conduct the experiment and time how long it takes for the balloons to fill and which fills first. Record your results.
- IMPORTANT: always use the same 4oz of vinegar and 2 tablespoons of baking soda. In a science experiment you should only change one variable at a time (in this case, the temperature of the vinegar) so that you know your changes in data are due to the specific change you made.
What if you use lemon juice instead of white vinegar?
- Repeat the procedure, except substitute 4oz of lemon juice for the 4oz of vinegar. Make a hypothesis about which you think will be faster, the lemon juice or the vinegar. Record your results and compare to the time data you already have for the baseline (room temperature) vinegar experiment.
What else could you change with this experiment?
- Size of the balloon
- Amount of baking soda
- Dilute the vinegar or lemon juice with water
- Size of the bottle
Other Easy Science Experiments Can You Do with Baking Soda?
There are many other science experiments that use baking soda. Here are a few we’ve compiled for easy, cheap, fun science fair projects for kids.
Baking Soda Rust Remover Experiment
Baking soda combined with lemon juice or white vinegar makes an effective DIY rust remover. The amount of baking soda and vinegar you’ll need depends on the size of the rusted object you need to refurbish. In general, the ratio is 2 parts baking soda to 1 part vinegar or lemon juice. You want to create a thick paste. To make:
- Combine 2 tablespoons of baking soda with 1 tablespoon of white vinegar or lemon juice in a small bowl.
- Stir together to create a thick paste. If it is too runny, add more baking soda, a little at a time.
- Apply the paste to the rusted areas on the object, such as a baking tray, a steel sink, or corroded metal fixture.
- Wait 20-30 minutes.
- Scrub, using a green scrubbing pad or a ball of aluminum foil. Repeat as necessary.
To make this into a science fair project, change the amount of time you leave the paste on the object, or try it with different scouring pads such as steel wool, a copper mesh scrubber, an abrasive sponge, or the aluminum foil. Make a hypothesis about which will work best and test it out!
A Bucket of “Snow” Experiment
For a fun science experiment, add about 8oz of baking soda to a bucket or cooler. For extra fun, place the baking soda in the freezer first, to give a cold effect. Very slowly add plain water, about 2 tablespoons at a time. There may be a small bubbling reaction but not a big fizz. Mix the baking soda with your hands or with a long handled spoon as you add water, and soon a lovely, packable “snow” will form. Now you can play, build snowmen or make snowballs!
After snowballs are made, you can set them in a bowl and slowly add vinegar (in a pipette or medicine dropper is ideal) to watch your snowballs fizz and melt.
A Bucket of Magic “Lava” Experiment
How about a bucket of fizzing, multi-color “lava”? Take a bucket and dribble different colors of food coloring in small distinct circles along the bottom. Optional: add 1 tablespoon of dish soap to the bottom. Cover the food coloring with about an inch of ARM & HAMMER Baking Soda.
Give kids a needleless syringe, pipette or medicine dropper of white vinegar and let them dribble it into the bucket a little at a time. The colors will begin to “magically” appear on the plain white surface. As more vinegar goes in, the surface will bubble up from the bottom and begin to fill the bucket with foam.
When finished, pour down your drain. Baking soda and vinegar make a great deodorizer and descaling agent for your pipes, and they are safe for septic systems and the environment.
More Information about Baking Soda for Science Fair Projects
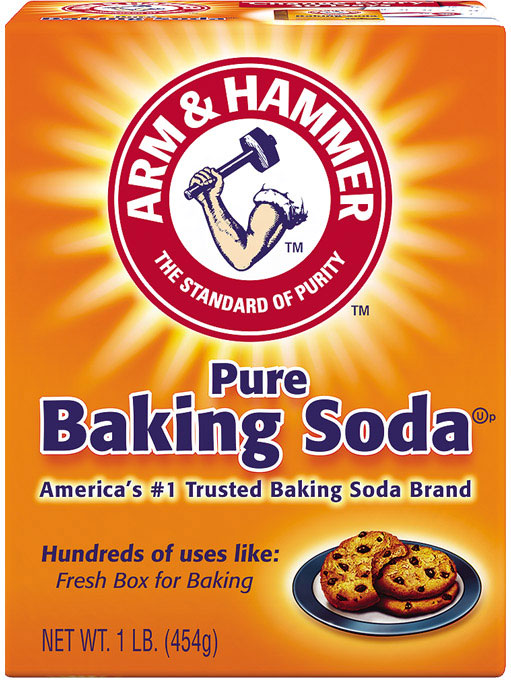
ARM & HAMMER™ Baking Soda is the Standard of Purity. It only contains pure baking soda and its manufacturing process does not taint it with ammonia. You can be sure your Arm & Hammer Baking Soda will be consistent and react properly every time. Don’t skew your science fair project’s results by mixing brands of baking soda or settling for one that isn’t pure baking soda.
To get your supply of baking soda for these cool and easy science experiments try:
Understand the differences between Baking Soda and Baking Powder with an article from our experts.
For more fun activities to do with your kids check out our DIY projects or our For Everything Soda activity page.