1. Design Your Own Winter Wonderland by Making a Snow Globe
There’s something magical about the first snowfall each winter. Wouldn’t you like to preserve that feeling? Try capturing your own snowstorm by making a snow globe and see if you don’t suddenly find a desire to go sledding or build forts for an epic snowball fight.
Ingredients & Supplies
- ~1 cup of ARM & HAMMER™ Baking Soda
- A mason jar or another large jar with a wide mouth
- Hot glue gun (to be used with adult supervision) and glue sticks
- White “school glue”
- Miniature pine trees or real pine needles
- Miniature holiday themed toys or figurines
- Fake snow (optional)
- Spray paint (optional)
- Glitter (optional)
Directions
- Remove lid of the mason jar and decorate as desired.
- Cover pine trees or needles with white glue, then coat the trees with baking soda.
- Let glue dry sufficiently.
- Use the hot glue gun to glue trees and other toys to the inside of your jar. If the lid has two separate pieces, glue them together.
- Fill jar or container with enough baking soda and fake snow so that it covers the bottom of the trees and toys in the jar.
- Screw the lid back on, flip the jar, and shake to bring the blizzard to life!
2. Hone Your Baking Craft with a Treat to Top Off Your Thanksgiving Feast
While a big bird is typically at the center of most Thanksgiving feasts, it’s important to complement your turkeys or Cornish hens with something sweet. Add to your cornucopia by baking some Orange Glazed Cranberry Bread. This recipe offers the perfect dish to balance any Thanksgiving table and leave all bellies feeling happy and full.
Ingredients & Supplies
-
For cake:
- 1 teaspoon ARM & HAMMER™ Baking Soda
- 2¼ cups all-purpose flour
- ½ teaspoon salt
- 1 large egg at room temperature
- ½ cup packed brown sugar
- ½ cup + 2 tablespoons granulated sugar
- 1 cup of buttermilk at room temperature
- 1/3 cup vegetable oil
- 1 teaspoon vanilla extract
- 2 teaspoons orange zest
- Aluminum foil
- 3 tablespoons unsalted butter, cold & cubed
-
For streusel:
- ½ teaspoon ground cinnamon
- 2 tablespoons granulated sugar
- 3 tablespoons butter
- 1 cup cranberries, fresh or frozen (for use when combining wet and dry ingredients)
-
For drizzle:
- 1 cup confectioners’ sugar
- 1-2 tablespoons orange juice
- 9x5 loaf pan
- Large and small mixing bowls
-
Non-stick spray
Directions
- Preheat oven to 350°F and spray pan or sheet with non-stick spray.
- To make the streusel: combine ¼ cup flour, 2 tablespoons sugar, ½ teaspoon cinnamon and 3 tablespoons butter in a small bowl. Pinch together until crumble is formed, then store in the refrigerator.
- In a separate bowl, whisk 2 cups flour with 1 teaspoon of baking soda and ½ teaspoon of salt.
- In medium bowl, whisk 1 egg, ½ cup of packed brown sugar and ½ cup + 2 tablespoons granulated sugar all together. Add 1 cup of buttermilk, 1/3 cup vegetable oil, 1 teaspoon vanilla extract and 2 teaspoons orange zest.
- Pour wet ingredients into the dry ingredients and combine. Add in 1 cup cranberries.
- Pour batter into loaf pan. Remove streusel from the refrigerator and place crumble over the batter, gently pressing in.
- Bake for 45-60 minutes.
- Allow bread to cool.
- In a small bowl, mix 1-2 tablespoons of orange juice and 1 cup confectioners’ sugar to make a drizzle. Layer over the cooled bread.
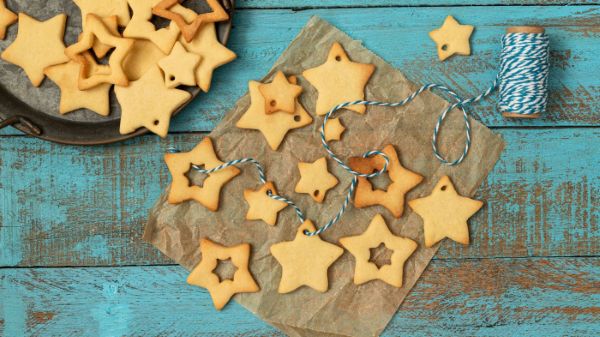
3. Cheer Up Your Rooms, Trees and More with this Classic Decoration
The holidays are meant to feel warm, cozy and loving. Dazzling garlands you’ve made together as a family can fill the household with cheer and have everyone singing “Deck the Halls” or “Hannukah, O Hannukah.” This twine star garland is a terrific Christmas or Hannukah craft idea that can adorn any area of your home. Add fairy lights or string lights to make your stars twinkle!
Ingredients & Supplies
- 1 cup ARM & HAMMER™ Baking Soda
- ½ cup cornstarch
- ¾ cup warm water
- Bowl
- Star-shaped cookie cutter
- Twine or some other thin and flexible wire
- Cookie sheet
- Rolling pin
- Hot glue gun (if using twine)
- Parchment paper
- Optional: fairy lights or LED string lights
Directions
- In a microwave-safe bowl, combine 1 cup baking soda, ½ cup cornstarch and ¾ cup warm water. Mix until baking soda and cornstarch dissolved in water.
- Microwave the bowl for 40 seconds. Remove and stir.
- Repeat above step 4-5 times until dough starts to dry and can be kneaded into dough. If using a stove, cook mixture over low heat until ingredients have the consistency of mashed potatoes.
- Sprinkle parchment paper with added cornstarch or sugar and roll dough out on the paper with rolling pin.
- Using cookie cutter, cut out stars and place them on a separate sheet of parchment paper.
- Line cookie sheet with parchment paper and transfer stars to cookie sheet. Bake for 45-60 minutes at 215°F and let cool.
- If using twine, add a dab of hot glue to the tip of the star before placing twine. If using a wire or some other string, wrap around the star. Leave space between each star on the garland. Let stars dry overnight.
- Should you want some added (optional) flair, wrap your twine or wire with fairy or string lights to add some more holiday sparkle!
4. Give Thanks with this Fun Thanksgiving Craft Idea
Although gifts and good food are two staples of holidays, it’s important to pause and show appreciation for family, friends, good health and other blessings. The Thankful Tree Thanksgiving craft is the perfect at-home activity that can teach your kids the spirit of gratitude while fostering their imaginations and creativity. Having a Friendsgiving Feast instead? This craft idea is fun for adults, too, and becomes a visible reminder of why you’re a chosen family.
Ingredients & Supplies
- 1 cup ARM & HAMMER™ Baking Soda
- ½ cup corn starch
- ¾ cup warm water
- Leaf cookie cutter
- Cookie Sheet
- Twigs
- Mason jar or vase
- Acrylic paint
- Paint Pens
- Yarn or string
- Straw or toothpick
- Cooking pot
- Rolling pin
Directions
- Mix baking soda and corn starch in a small cooking pot, then add water.
- Add to medium heat and stir. Continue stirring until consistency resembles cake frosting. Alternatively, you can use the microwave the mixture for 40 seconds and stir. If using the microwave method, repeat this step until the mixture can be kneaded into dough.
- Remove from heat and allow dough to cool.
- Roll out your dough and use cookie cutters to form leaf shapes. Poke a hole at the bottom of each leaf cutout using straw or toothpick.
- Allow dough to dry on cooling rack.
- Once dried, paint your leaves and express your thanks by writing (using a paint pen) who or what you’re thankful for on your leaf cutouts!
- Place twigs in a jar or vase and tie leaves to different twigs by running yarn or string through the small, cutout holes at the bottom. Or place leaves along the table runner as decoration, or in a bowl for a centerpiece.
5. Baking Soda Ornaments that Make Your Tree Smell Even More Fresh!
A Christmas tree isn’t quite complete without ornaments, so why not craft some yourself! These scented baking soda ornaments are easy to make and will add a lovely, wintry aroma to your home, one that might even make Grinches and Scrooges everywhere crack a smile. Ornaments also make great homemade gifts, so they’re a good excuse to do some holiday crafts. Simply break out the baking soda and get to work on a classic holiday decoration!
Ingredients & Supplies
- 1 cup ARM & HAMMER™ Baking Soda
- ½ cup cornstarch
- ¾ cup warm water
- 15 drops of essential oil (try cinnamon, nutmeg, orange, cloves or vanilla)
- Rolling pin
- Parchment paper
- Baking sheet
- Cookie cutters or wide-mouthed cup or glass
- Large toothpick or skewer
- Glitter
- Food coloring
- Bowl
- Ribbon or thread
Directions
- In a microwave-safe bowl, combine 1 cup baking soda, ½ cup cornstarch and warm water. Mix until ingredients dissolve.
- Microwave bowl for 40 seconds. Remove and stir. Repeat 4-5 times until dough dries and is ready for kneading.
- Stir in essential oil. Add glitter for a more sparkly effect.
- Sprinkle cornstarch on parchment paper and rolling pin and roll out dough.
- Use cookie cutters or wide-mouth cup or glass to create ornaments. If you want, you can use stamps to imprint designs on dough.
- Move ornaments to a cookie sheet and puncture a hole in each ornament to add a ribbon or thread.
- Allow 24-48 hours to harden at room temperature, then add your ribbon or thread. Hang or drape your ornament and watch it sparkle!
6. Baking Soda Honeycomb Candy for a Holiday Sweet Treat

Complement the changing colors of the leaves and crispness of the fall air with something sweet for your taste buds by whipping up a batch of Maple Honeycomb candy. This candy’s flavor profile complements Thanksgiving, Christmas and holiday meals and is a light sweet treat that gets its texture from baking soda bubbles. Perfect your baking craft and create a new holiday dessert tradition or package some up as a gift or stocking stuffer!
Ingredients & Supplies
- 1 teaspoon of ARM & HAMMER™ Baking Soda, sifted
- 1¼ cups sugar
- ½ cup maple syrup
- ¼ cup water
- Parchment paper
- 8x8 pan
- 1½ teaspoons flaky sea salt
- Large saucepan
- Semi-sweet chocolate (optional)
Directions
- Line 8x8 pan with parchment paper so that it hangs over the sides.
- In large saucepan, combine 1¼ cups sugar, ½ cup maple syrup and ¼ cup cold water.
- Set the saucepan over medium-high heat. Do not stir yet.
- Let mixture boil, then cook for about 5-7 minutes.
- Remove the pan from heat. Add 1 teaspoon of baking soda and whisk. Be wary of foam.
- Pour mixture into lined pan. Do not smooth out the mixture, as it will knock out the air bubbles.
- Sprinkle sea salt on the candy. Set aside to dry.
- Break the candy into chunks and. For some added flavor, try dipping it in semi-sweet chocolate. Yum!
7. A Festive Pinecone DIY Craft to Complement Your Wreaths and Mistletoe!
People often assemble the greenery—from wreaths to poinsettias—during the holidays, among other colors. However, you don’t need to go through extreme lengths to give your home a merry vibe. In fact, with baking soda, it’ll take you only 20 minutes (roughly) to create your own snowy pinecone arrangement. Sounds (and smells) great, doesn’t it?
Ingredients & Supplies
- ½ cup of ARM & HAMMER™ Baking Soda
- Clean, empty large can, ideally 28 ounces
- Sand or rocks
- Water (around 28 ounces) to fill can
- 5-inch burlap ribbon
- Twine
- Pinecones
- Masking or adhesive tape
- Tree trimmings (real or fake)
- Twigs (real or fake)
- Salt (Kosher or Epsom)
- Hot glue gun (to be used with parental guidance)
- Sponge paint brush
- Small bowl
Directions
- Combine ½ cup baking soda and ½ cup salt in a small bowl. Mix and set aside.
- Assemble pinecones or branches. Apply glue to the edges using a paint brush.
- Sprinkle baking soda and salt mixture and sprinkle it onto the glue. Allow 10 minutes to dry before dusting off excess.
- Fill can with 2-3 inches of sand and add water to make it compact. Alternatively, you can add rocks and skip the water.
- Place your tree trimming and pinecones in the can to form your arrangement.
- Now, decorate your arrangement! Tape one end of the burlap ribbon and wrap it around the can, then tape it again to secure the other end.
8. Make Holiday Figurines with Baking Soda Clay
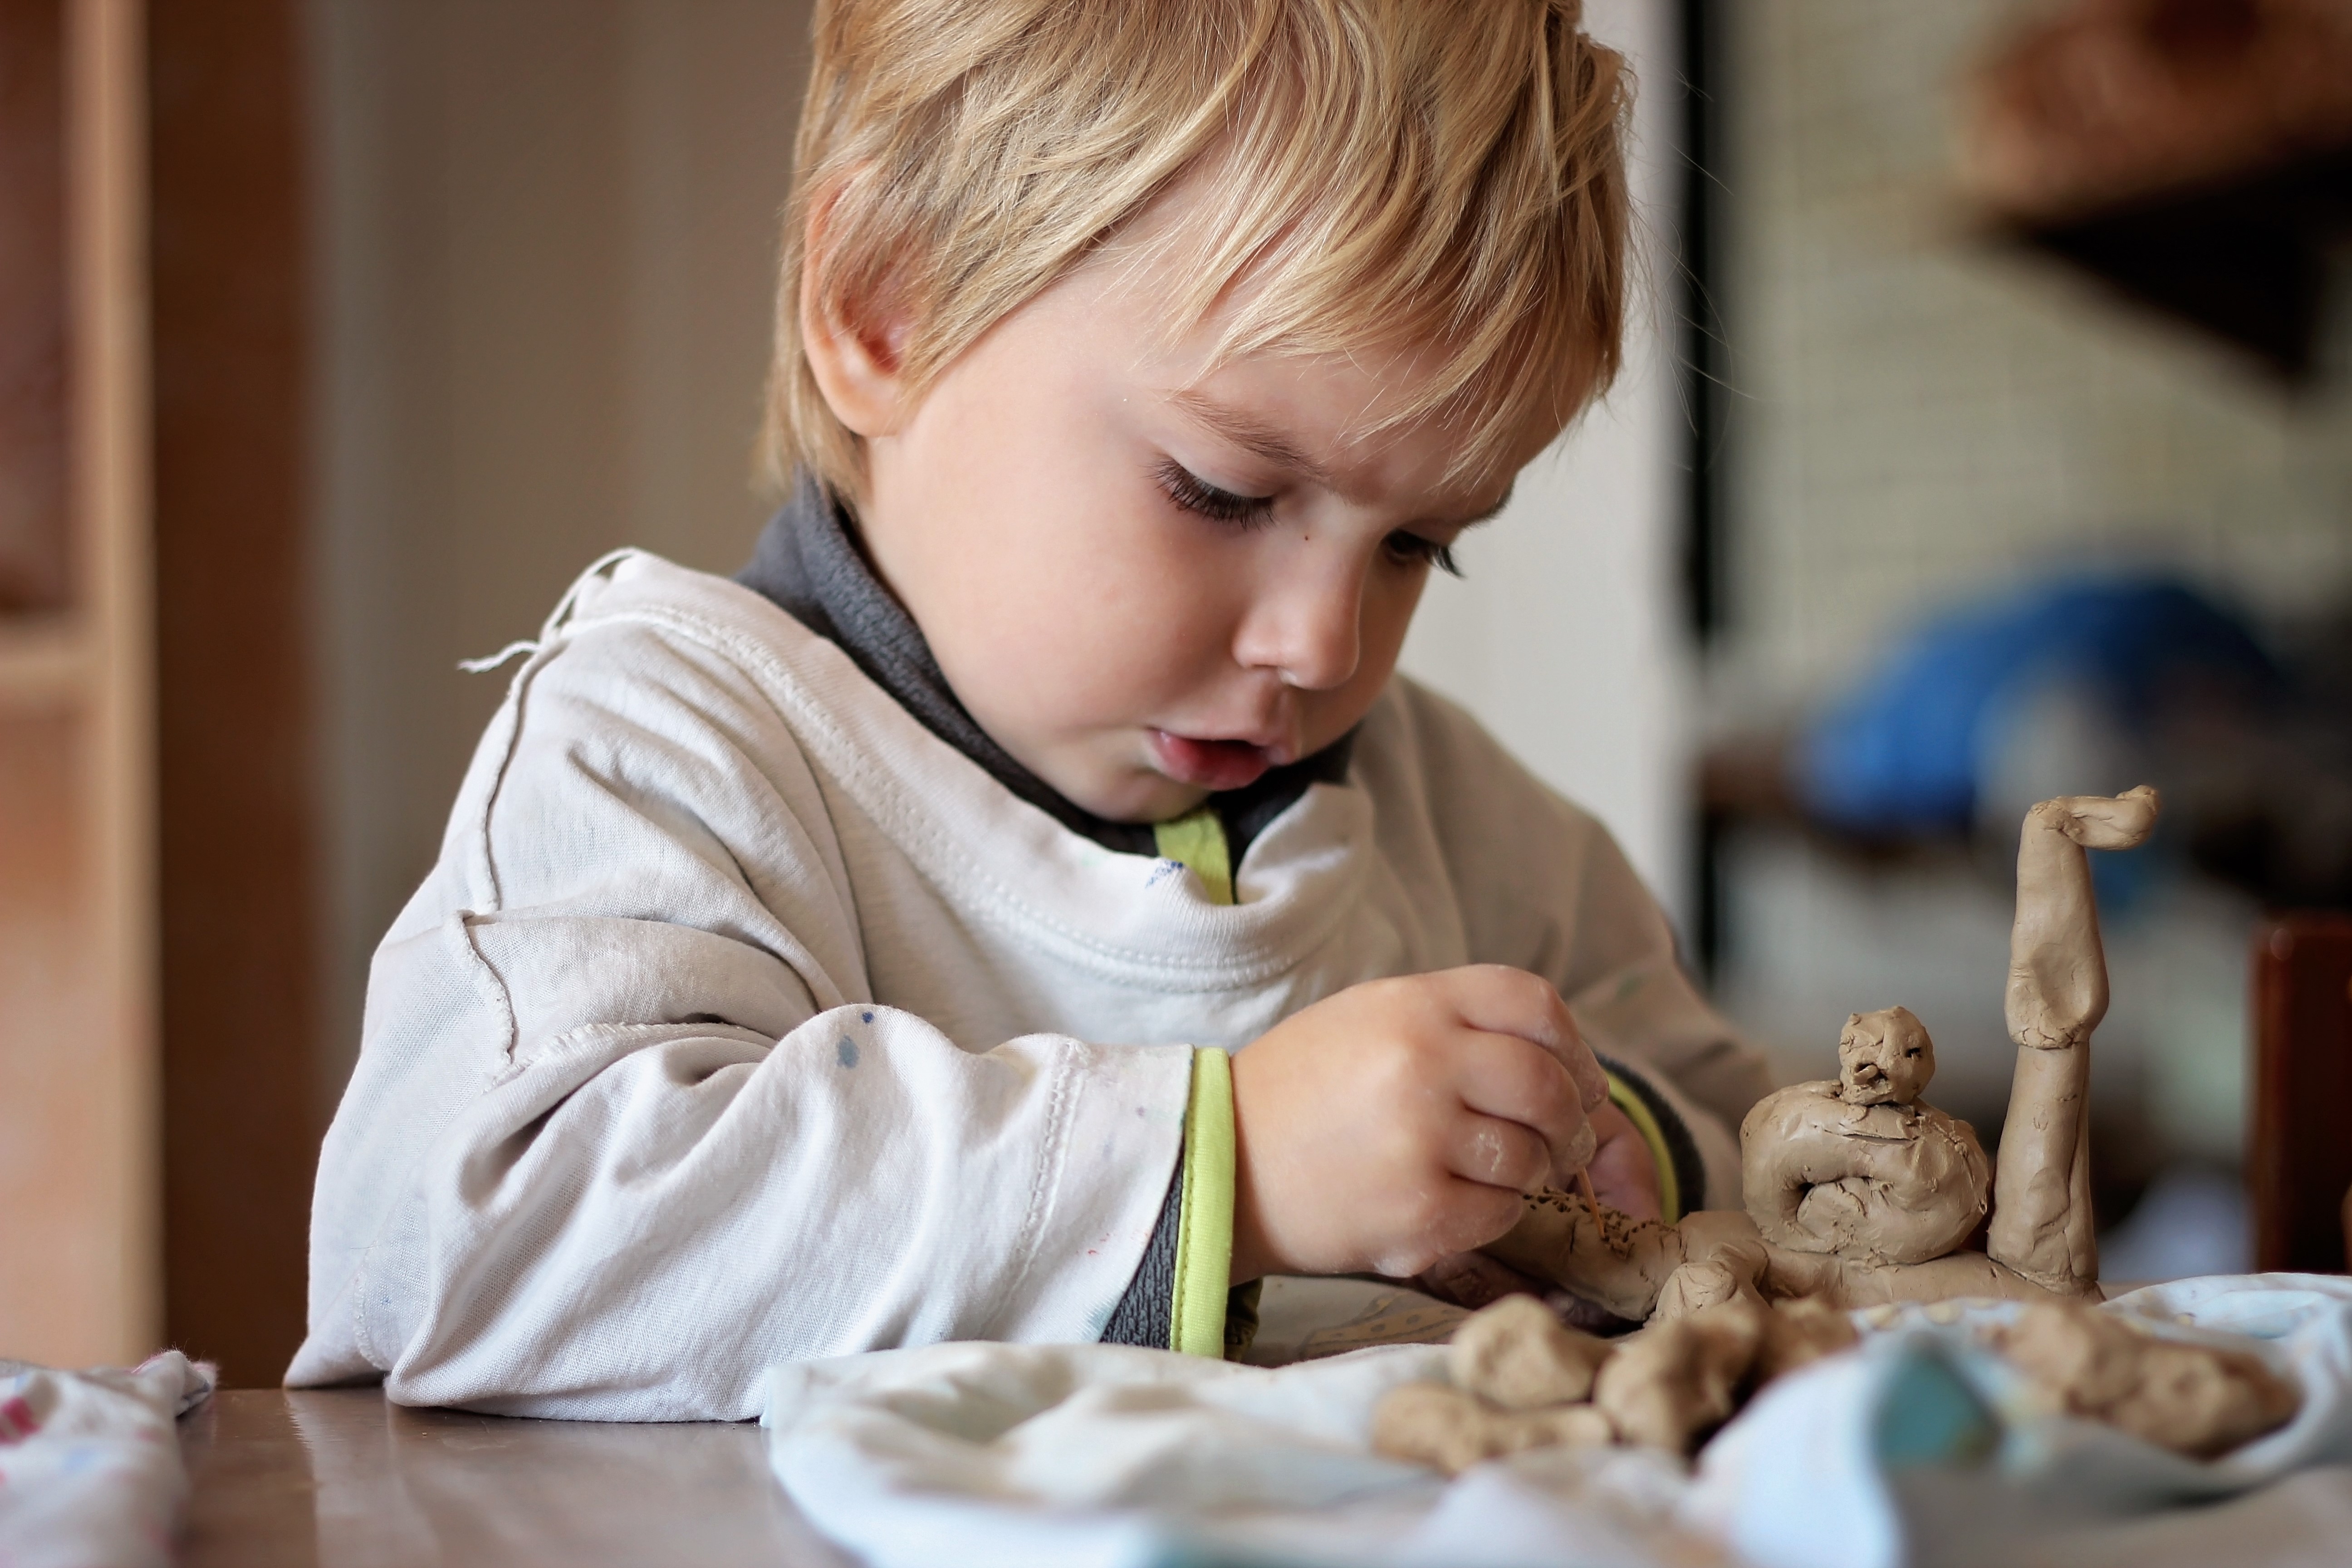
Do you feel some cabin fever during the fall and winter and grow tired of watching television or reading? Try Modeling Play Clay, one of the many easy DIY activities with baking soda! Family get-togethers during the holidays can be a good excuse for everyone to get their hands a little messy and have some fun with easy at-home crafts. You can put a cool spin on your baking soda play dough by making snowmen, trees, menorahs, dreidels, reindeer, angels, and more to create a holiday scene or diorama!
Ingredients & Supplies
- 2 cups ARM & HAMMER™ Baking Soda
- 1 cup cornstarch
- 1¼ cups water
- Food coloring (artificial or natural)
- Airtight container for storage
- Medium saucepan
- Plate
- Cloth or Saran wrap
Directions
- Pour 2 cups baking soda and 1 cup cornstarch into a saucepan. Stir until mixed.
- Add 1¼ cups water and continue to mix.
- Add food coloring as desired and mix.
- Cook over medium heat, stirring frequently for a total of 10-15 minutes.
- Remove from heat, put on a plate and cover with cloth or plastic wrap.
- Once cooled, knead until smooth.
- Store in an airtight container for up to 1 week. To preserve a clay creation, leave out to dry overnight.
9. Craft a Dazzling Dessert Display with Baking Soda Textured Paint
Pies, cookies, Bundt cakes and more holiday treats are as much about the presentation as the taste. After all, isn’t everything decorative this time of year? With baking soda, you can make a matte-finish painted dessert stand to showcase your pumpkin pies, rum balls or gingerbread cookies. It’ll look every bit as artistic as your glass vases! This easy DIY holiday craft will have your guests going “oooh” before they go “mmm.”
Ingredients & Supplies
- Plastic or ceramic cup or bowl for pedestal of stand
- Plastic or ceramic plate for platform of stand
- Permanent glue (kids should use with adult supervision)
- ARM & HAMMER™ Baking Soda
- Primer paint
- Acrylic craft paint
- Paint brush
- Cups/bowls for mixing paint
Directions
- Glue cup or bowl to underside of the plate to create the stand. Press and hold while glue sets.
- Let dry for at least 30 minutes.
- First, paint cake stand with primer paint and allow 30 minutes to dry.
- Next, create textured paint by adding one part baking soda and two parts acrylic paint. You can eyeball the amount of baking soda you use but maintain that 1:2 ratio.
- Paint cake stand with color of your choosing.
- What’s for dessert?
10. Bring Added Cheer and Fun Gifts with Cake-in-a-Jar Soda
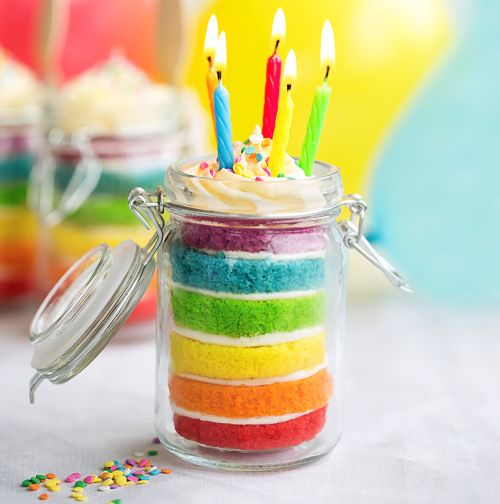
Instead of presenting your cakes on the dessert stand you learned to make above, what about assembling them in a jar? Use baking soda to make holiday-colored cake and layer it with frosting in a jar for your festive party or as a fun gift for friends, family and community members.
These cute cakes-in-a-jar are a great alternative to traditional bags of Christmas cookies or loaves of fruitcake for a homemade and heartfelt gift. They also make a lovely holiday meal dessert that you can make ahead for the crowd.
And while they’re a fun holiday treat, these cakes in a jar can be made all year long! How about as an alternative to traditional cupcakes at your child’s next birthday party? Perhaps rainbow layers for Pride or red, white and blue layers to celebrate independence? The possibilities are endless!
Ingredients & Supplies
-
Cake Batter:
- 1 ½ cups all-purpose flour
- 1 cup granulated sugar
- 1 teaspoon baking powder
- ½ teaspoon ARM & HAMMER™ Baking Soda
- ½ teaspoon salt
- ½ cup whole milk
- ¼ cup vegetable oil
- 1 large egg
- ½ teaspoon vanilla extract
- ½ cup boiling water
Buttercream frosting
Sprinkles (optional)
Jars
Piping bag, or zip-close bag and scissors
Small bowls, one for each color of cake batter
Food coloring of choice to tint batter
Small circular cookie cutter
Cupcake liners and muffin pan
Directions
- Preheat oven to 325°F
- Add 1 ½ cups flour, 1 cup granulated sugar, 1 teaspoon baking powder, ½ teaspoon baking soda and ½ teaspoon salt to a large bowl and whisk.
- Add ½ cup whole milk, ¼ cup vegetable oil, 1 egg and ½ teaspoon vanilla extract to the dry ingredients and stir. Pour in ½ cup boiling water and whisk more.
- Divide batter into bowls and add different colors of food coloring to each bowl.
- Line muffin pan with cupcake liner and spray lightly with cooking spray.
- Pour batter into the pan and divide evenly among cupcake liners. Bake for 25 minutes and cool in pan for 10 minutes.
- Unwrap cooled liners and trim the tops and bottoms.
- Cut each cupcake lengthwise into 2-3 round disks. For taller jars, use wider slices. For shorter jars, use thinner slices.
- Use cookie cutter to trim so each disk fits into a jar.
- Place one slice of cupcake at the bottom of each jar. If making rainbow cupcakes, start with purple, following this pattern: purple, blue, green, yellow, orange, red.
- Spoon frosting into piping bag. Pipe frosting into jar, covering the first cupcake layer evenly with frosting.
- Add your next cupcake layer, pipe in another layer of frosting. Repeat the process until your jar is filled with layers of cupcake.
- Top the final layer with frosting and, as an optional step with added pizzaz, decorate with sprinkles.
11. Avoid Holiday Stress by Making an Aromatherapy Diffuser
Although the holidays are a time of cheer and family, they can also be quite stressful. From cooking and cleaning to buying gifts and dealing with holiday travel, there’s always plenty to do as each year comes to a close. Ease those stressors by making an aromatherapy diffuser that fills the air with a natural fragrance. These also make great gifts for teachers, coaches, co-workers or whoever is on your shopping list.
Ingredients & Supplies
- ARM & HAMMER™ Baking Soda
- Small glass jar (food jar or mason jar)
- 2-3 tablespoons of dried ingredients for desired scent. Try lavender, cinnamon, star anise or dried orange peel.
- Essential oil for desired scent
- Breathable fabric, such as burlap
- Festive ribbon (optional)
- Fork
Directions
- Fill jar halfway with baking soda (amount varies based on jar size).
- Add dried ingredients to jar.
- Add 15-20 drops of desired essential oil.
- Mix baking soda, dried ingredients and essential oil with a fork to distribute.
- Cover the jar with a fabric and tie with a ribbon, if you choose.
- For a stronger scent, add a few drops of essential oil directly to the fabric.
Baking Soda Makes For Easy, At-Home Holiday Fun
Stock up on ARM & HAMMER™ Baking Soda before the holiday season to be ready for your Christmas or Hannukah baking and for easy DIY holiday crafts to keep things lively at home. Baking soda is the secret to crisp turkey skin, tender meat, the snap of peanut brittle, the rise in your gingerbread, the fizz in your holiday bath bombs and a host of festive holiday slimes! One box can help make it feel like the “most wonderful time of the year.”